Wednesday 23 December 2015

Clearing out move requests

When you perform a successful mailbox migration, either from another version of Exchange or from another mailbox database the move request is "left" behind as such and should be cleared out as part of good housekeeping.

My favourite command for doing this is:

Get-MoveRequest -MoveStatus Completed | Remove-MoveRequest

Wednesday 2 December 2015

SCCM Client Version Report

In order to help understand what versions of the SCCM client is out there within our environment I have pulled together this SQL query to help:

select sys.Client_Version0, "CM Name"=
case sys.Client_Version0
when '4.00.6487.2000' then 'CM07 SP2 (4.00.6487.2000)'
when '4.00.6487.2188' then 'CM07 R3 (4.00.6487.2188)'
when '4.00.6487.2187' then 'CM07 R3 (4.00.6487.2187)'
when '4.00.6487.2157' then 'CM07 R3 (4.00.6487.2157)'
when '5.00.7711.0000' then 'CM12 RTM (5.00.7711.0000)'
when '5.00.7804.1000' then 'CM12 SP1 (5.00.7804.1000)'
when '5.00.7804.1202' then 'CM12 SP1 CU1 (5.00.7804.1202)'
when '5.00.7804.1300' then 'CM12 SP1 CU2 (5.00.7804.1300)'
when '5.00.7804.1400' then 'CM12 SP1 CU3 (5.00.7804.1400)'
when '5.00.7804.1500' then 'CM12 SP1 CU4 (5.00.7804.1500)'
when '5.00.7804.1600' then 'CM12 SP1 CU5 (5.00.7804.1600)'
when '5.00.8239.1000' then 'CM12 SP2 (5.00.8239.1000)'
when '5.00.8239.1203' then 'CM12 SP2 CU1 (5.00.8239.1203)'
when '5.00.8239.1301' then 'CM12 SP2 CU2 (5.00.8239.1301)'
when '5.00.7958.1000' then 'CM12 R2 (5.00.7958.1000)'
when '5.00.7958.1101' then 'CM12 R2 KB 2905002(5.00.7958.1101)'
when '5.00.7958.1203' then 'CM12 R2 CU1 (5.00.7958.1203)'
when '5.00.7958.1303' then 'CM12 R2 CU2 (5.00.7958.1303)'
when '5.00.7958.1401' then 'CM12 R2 CU3 (5.00.7958.1401)'
when '5.00.7958.1501' then 'CM12 R2 CU4 (5.00.7958.1501)'
when '5.00.7958.1604' then 'CM12 R2 CU5 (5.00.7958.1604)'
when '5.00.8239.1000' then 'CM12 R2 SP1 (5.00.8239.1000)'
when '5.00.8239.1203' then 'CM12 R2 SP1 CU1 (5.00.8239.1203)'
when '5.00.8239.1301' then 'CM12 R2 SP1 CU2 (5.00.8239.1301)'
else 'Others(non-Clients)'
End,count(*) [Total]
from v_R_System sys
where sys.Name0 not like 'unknown' and
sys.Client_Version0 not like '' and sys.Client_Version0 not like '0.0%'
group by sys.Client_Version0
order by 3 desc

Tuesday 24 November 2015

Dicota Active Backpack Review

The choice available when buying a laptop bag is bewildering, but the Dicota Active stands out from the crowd. Both for its looks and ability to carry all your stuff safely. 

Dicota are a company that were formed in 1992, they have their headquarters in Switzerland. They have established themselves as a customer focused company that has a passion for making quality notebook cases.  

Unpacking the Active


The Dicota Active is a premium laptop backpack with a sporty look.  It has an attractive look and quality feel about it.  It boasts several compartments, a main one at the back to help store your laptop, a second one that can help to organize your cables, accessories, etc and two smaller compartments at the front to store additional items. 

I've been using the Dicota Active for the last week to carry around the kit that I need for my work.  I've quite comfortably been able to carry about my laptop, charging cables, mouse, mobile phone, pens, notepads, water bottles, wallet, and snacks without the bag becoming cumbersome, awkward or stretched. 

Carrying the Active, even it’s been full, is surprisingly comfortable thanks to the design of the shoulder straps and the ergonomic back cushioning.  There is also a useful handle at the top of the backpack. There is a sternum strap on this backpack but I've found that I haven’t had to use it as the backpack fits comfortably without it. This meant there were hanging straps and clips that could get caught or trodden on.
Packed with my work kit

It doesn't look like the traditional backpack you see commuters using to carry their laptops around so that fact adds an extra level of security when commuting.  I was impressed by the quality and feel of the backpack, I've only used it for a short time but you can tell that it a quality product and with a lifetime warranty you are definitely making a safe investment.

One small detail that I really like about the bag is the zipper toggles, their design make it really easy to find the zip and open/close the pockets.  The laptop compartment also has an extra wee hook on it so that you can padlock that compartment should you feel the need.  

Zip Detail


As a backpack to commute to and from work this bag definitely ticks all the boxes and has impressed me.  I’m not sure it could easily carry my work kit and an overnight set of clothes/toiletries etc unfortunately and doesn’t boast being TSA compliant either.

The backpack does struggle to stand up on its own when empty or full but due to the design and layout of the pockets and compartments this is not an issue as everything is easily accessible.

The Active has a lot of pockets for keeping things organised, a lot of protection for your gadgets and is an attractive backpack.  It can be found for around £50 in the UK, making it great value.  I would definitely recommend.

The backpack can currently be found on sale at Amazon UK - DICOTA Active Laptop Backpack 14-15,6Zoll black / Magenta


Official Dicota Active Marketing Photos


Monday 2 November 2015

Exchange 2013 Active Directory property ‎homeMDB‎ is not writeable on recipient

When trying to migrate users from Exchange 2007 to Exchange 2013 you may see the following error below:

 Error:MigrationPermanentException: Active Directory property ‎'homeMDB‎' is not writeable on recipient ‎'domain.local/users/employee.smith‎'. --> Active Directory property ‎'homeMDB‎' is not writeable on recipient ‎'domain.local/users/employee.smith‎'.
With many Exchange issues the solution is to set the correct permissions to allow Exchange to migrate the mailbox.

To resolve this issue follow these steps:


  1. Launch Active Directory
  2. Click on View and select Advanced Features


  3. Now location the users mailbox you are having the issue with and select properties
  4. Now click on the security tab
  5. Next select Advanced


  6. Now place a tick in the "Include inheritable permissions from this objects parents" box and click OK
  7. It may take a few minutes for this change to take effect but once it has you should be able to migrate the users mailbox without any problems. 


  • Wednesday 28 October 2015

    Unable to sync phone to Exchange

    If you've been following my blog for the last few weeks you'll have heard me talk about the Exchange 2013 migration project I've been working on.  Well we hit another snag in the migration the other day around the users mobile phones not syncing to the new mailbox server after moving to Exchange 2013.

    At first we thought it was just one or two users but it transpired that over 80 users were affected!! After investigating whether or not ActiveSync was working as expected (it was) we turned our attention to looking at an issue within the users accounts.

    It turned out that the 80 users were all a member of a protected group within Active Directory and weren't getting the correct permissions to sync their phones as per Microsoft's best practices.

    In order to get to that stage I used some PowerShell queries which I thought were quite interesting so I'm sharing.

    I used the following command to query Active Directory for all users that had the "AdminCount" attribute set to something greater than 0.  If set to 1 it indicates the user is either a member of a protected group or has been:


    Import-Module ac* 
    Get-ADuser -filter {admincount -gt 0} -Properties admincount -ResultSetSize $null | export-csv c:\\onyx\document.csv

    To find out which groups within the Active Directory environment I was working in were considered a Protected Group I ran the following query:

    Import-Module ac*
    Get-ADgroup -LDAPFilter "(admincount=1)" | select name 

    From there I was able to check the groups individually to see which ones contained, if any, the users that were having issues with their phones.  All the affected users were a member of the "Print Operators" group. Mystery solved!


    Monday 26 October 2015

    Swissgear GA-7305-14F00 Synergy Laptop Bag Review

    As an IT Consultant I often have to carry my office with me to client sites and having a comfortable, secure backpack to do this is a must.

    A few years ago I purchased the Swissgear GA-7305-14F00 Synergy Bag and have thoroughly enjoyed my purchase.

    Swissgear GA-7305-14F00 Synergy Laptop Bag


    Having ten pockets, all of varying sizes is extremely handy. It allows me to organise all my items into a neat organised structure for easy access.

    The laptop pocket at the back easily carries and protects my Lenovo E540.  While the wee pocket at the top is handy for storing my passport, pens, headphones, phones, powerbars, keys and much more for quick access.

    The four pockets on the sides (two each side) allows me to easy carry umbrellas and bottles of water on the outside avoiding any water damage to the items on the inside of my bag.

    The main storage pocket is massive and I've managed to fit a change of clothes for an overnight stay, books, notepads and charging cables etc without any hesitation.  I've also still been able to fit the bag easy into cabin luggage on airplanes.

    The bag has a stiffened floor that gives the bag its stand-up behaviour which is useful when packing or emptying the bag.  This stiffened floor can also be easy raised so that the bag can be collapsed flat.

    Even fully packed with items the backpack is comfortable to carry and helped to easy the weight being carried.  There is no waist strap on this model but it's not a problem for me as I don't want to many straps and clips hanging off the bag that could get caught.

    The zips on the bag are also built so that you can easily slip a padlock between them to secure your items if you need to leave it somewhere.

    I'd highly recommend this backpack for any IT professional.

    If you are interested in purchasing this bag you can find it on sale at Amazon UK here - http://amzn.to/1GSuLdy.  Please note this is an affiliate link and purchasing via this link will help support this blog.

    Friday 23 October 2015

    Get Mailbox Move Progress

    I've recently been involved in an email migration from Exchange 2007 to Exchange 2013 and in order to monitor the progress of the mailbox moves I've been using Powershell commands, the two I've used are:

    Get-MoveRequestStatistics -MoveRequestQueue "Mailbox Database 1"| Sort PercentComplete

    This results in giving the Display Name, StatusDetail, TotalMailboxSize, TotalArchiveSize and PercentComplete of each mailbox move to that Exchange 2013 database.


    The other one that I've found useful is:

    Get-MoveRequestStatistics -MoveRequestQueue "Mailbox Database 1"| Where-Object {$_.StatusDetail -eq "Copying Messages"} | Sort PercentComplete

    This is just a variation on the first query but it only shows the mailboxes that are currently copying messages to the Exchange 2013 environment.


    Just remember a watched kettle never boils though! lol 

    Wednesday 21 October 2015

    Powershell Query to Analyze your Mailbox Movement

    I've recently been doing an Exchange 2007 to Exchange 2013 migration and wanted to find out the kind of speed the mailbox moves were taking.  I used the below Powershell script to pull out the MB transfer speed per minute:


    Get-MoveRequest | Where { $_.Status -eq “Completed” } | Get-MoveRequestStatistics | Select DisplayName,TotalMailboxSize,TotalMailboxItemCount,@{n=”Speed MB/min”; e={ [int]($_.BytesTransferred.ToMB() / $_.TotalInProgressDuration.TotalMinutes) }}


    Friday 16 October 2015

    Build your skills, slowly and deliberately

    I graduated from college with an IT degree back in 2004 and was lucky enough to secure a 1st level support job not long after that. Over the last 11 years I have worked my way up and along the IT industry but I now how the job title of "Technical Consultant", by no means does this mean I know everything but I have a certain wealth of self-taught and mentored learning under my belt. I'm proud of my achievements and strive daily to learn and expand my skillset, however recently I've seen a lot of younger guys come in and expect to be doing Senior IT roles within 6 months of graduating from college. My advice to them always it to take your time building up your skills slowly and deliberately.

    Just because you've used a product for a week does not mean you know it, you need to get a couple of years of managing that product in a production environment under load before you can truly know a product.  You need to combine your knowledge with experience otherwise it's useless in my eyes.  Unfortunately there is no quick way of gaining experience you need to be patience and slog it out, and no amount of training can compensate for the lack of experience.

    A common mistake among the junior staff is that they are doing the same job as the senior technicians in their teams. This ultimately isn't true, junior staff receive a lot more support than they release and if they were thrown into the deep end they would unfortunately flounder.  Be confident but don't be over cocky.

    I always say that IT is no different to any other job, if you were learning a trade such as plumbing you'd spend your first few years being an apprentice, learning the basics, soaking up knowledge from your mentor before gradually moving onto doing jobs yourself.  The same is true for IT.  Don't try and skip the 1st level support jobs because you deem them boring, take that job, learn from it, build yourself a good foundation of knowledge and customer service.  Then progress to the next level. Take your time.

    Learn from the jobs you can get, please don't try and run before you walk you will get there.  You will get that much coveted Senior position when you are ready.  You have 30-40 years ahead of you, don't rush it.  Build your skills, slowly and deliberately.


    Tuesday 29 September 2015

    A review of the Unified Communications Day conference

    Yesterday I attended the first Unified Communications Day at the National Motorcycle Museum in Birmingham, and I must say it was a very worthwhile event to attend.

    The event was the brain child of Andrew Price and several of colleagues and it's goal was to bring together like minded people in the hope of networking and sharing knowledge on Unified Communications (Exchange/Office 365/Skype for Business) systems.

    The UC Day team had managed to gather some very recognisable and well known names to attend and speak at the event as well as attracting the support of many big name companies to sponsor the event.

    Attended the event for me meant a trip down south to Birmingham, but as the event venue (the National Motorcycle Museum) was only a 10 minutes taxi ride from the airport it was very accessible.

    On arrival we collected our lanyards and badges and gathered for some pastries and coffee to start the day off, it was a nice way to ease into the day by catching up with old colleagues and friends also attending the event. The keynote speech by Andrew Price and Ian Woolner from the Microsoft Skype team. There was a nice buzz to the opening session of the day, you could tell that everyone was excited about what lay ahead.

    Once the keynote was finished we all broke away to our sessions. There were three conference rooms dedicated to sessions throughout the day, one for Skype for Business, one of Office 365 and lastly one for Exchange. I chose to head to Steve Goodman's "Exchange 2016 Hybrid – Getting it right first time" session. Having followed Steve on Twitter and read many of his blog/tutorial posts over the years it was a nice chance to get to meet the man in the flesh and hear what he had to say. His session was very informative and gave a very good overview of what to do and what not to do in regards to a hybrid setup.

    My second session of the day was Gary Steere's "Troubleshooting AutoDiscover and Availability in Exchange and Office 365" session. One of the best sessions of the day for me, Gary took the Autodiscover right back the basics and gave us some useful insights and tips on how to troubleshoot and set up Autodiscover within Exchange.

    After a well deserved lunch break I chose to attend Justin Harris's "So You Think Your Directory is Ready for Office 365?" session. I came out of the session a little disappointed as I don't think the session went deep enough into the topic for the audience that attended. It was billed as an Intermediate session but I was still left a little wanting from it.

    My next session was with Dave Stork on "Tooling Your Exchange", unfortunately the Demo Gods were against Dave during his session but none the less he pointed out some really good tips on troubleshooting Exchange and listed some great resources to use.

    The penultimate session of the day for me was Michael Van Horenbeeck's "Exchange Hybrid Inside and Out" session. Michael is an energetic speaker and had the audience really engaged. He was struggling to cram all his content into the 45 minutes he had but he crammed alot into that session. Definately another session for me that was worth travelling for.

    Nick Parlow's "Be Smart, Play Dumb; Exchange Design and Operations for Shared Services" session was the last of the day. Again Nick is an engaging speaker and had the audience intrigued with his knowledge and witty banter.

    Overall, I feel the event was very worthwhile. I thoroughly enjoyed being able to learn from people who I regularly follow and use as mentors via Twitter and blog posts. It was also nice to get a chance to meet up with old colleagues and discuss issues and woes we have with clients, technology and life itself. The event was extremely well organised and laid out by Andrew and his team, here's hoping they will be able to organise the event again for next year and even more people make take the time to support it. We definitely need more events like this in the UK, there is an active and dedicated community willing to get involved and support events like this without a doubt. It's just a shame that there is a lack of woman within the IT community, would love to see some more females rolling up their sleeves and getting involved in the technical aspect of IT.


    My Top Three Sessions
    1. Michael Van Horenbeeck's "Exchange Hybrid Inside and Out" session
    2. Gary Steere's "Troubleshooting AutoDiscover and Availability in Exchange and Office 365" session
    3. Nick Parlow's "Be Smart, Play Dumb; Exchange Design and Operations for Shared Services" session
    Unified Communications Day website - http://www.ucday.co.uk/


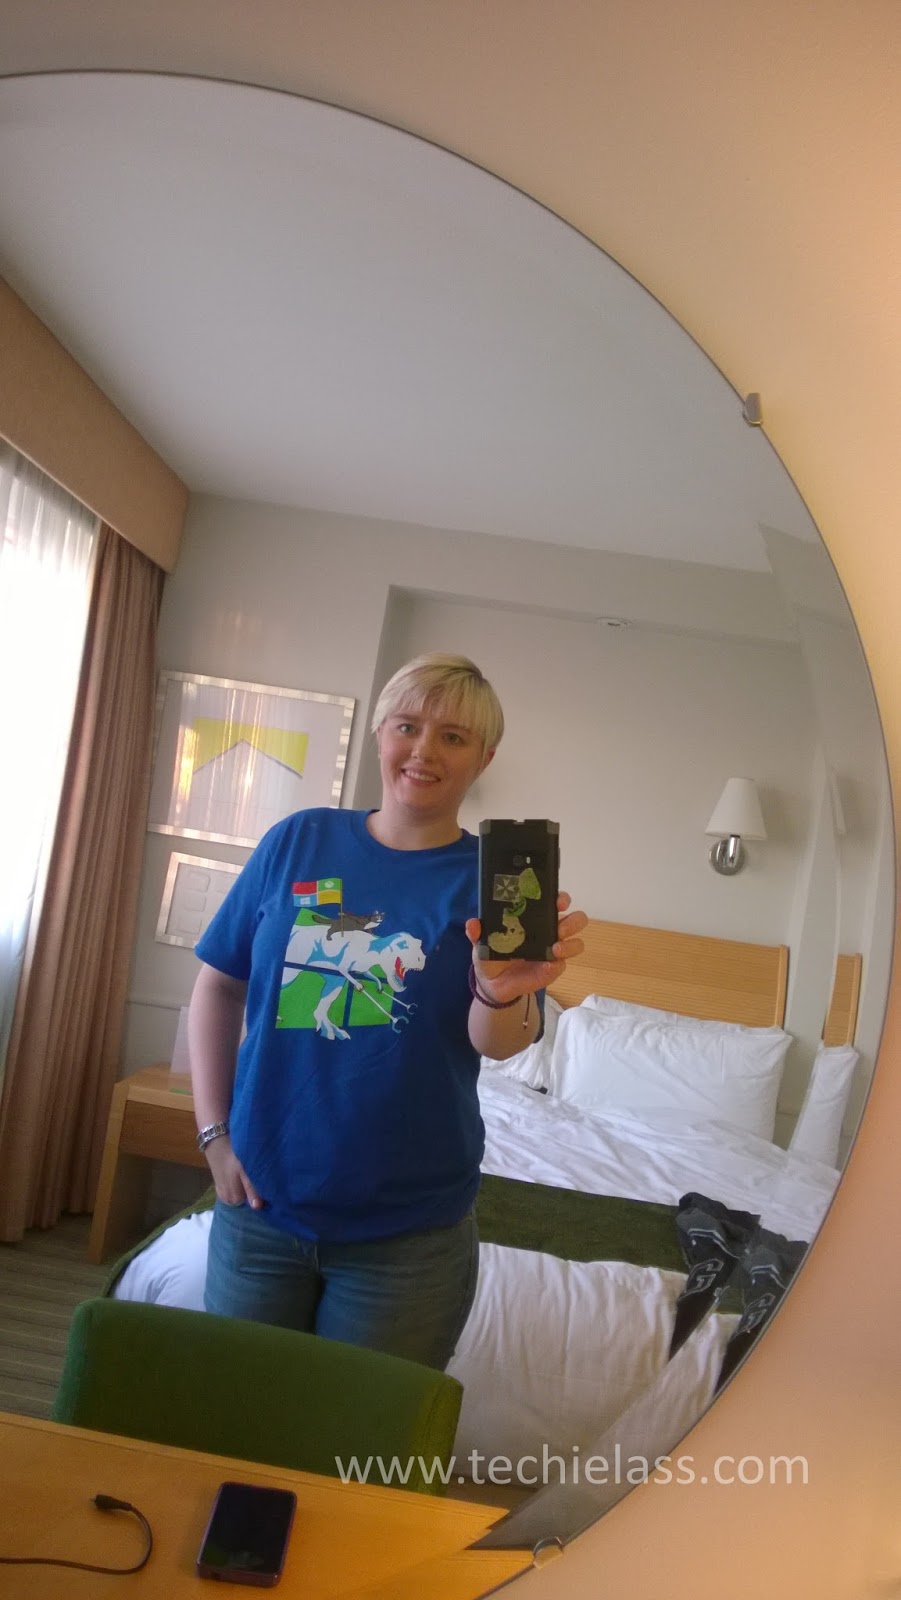
    All ready for the event in my Windows 10 #UpgradeYourWorld t shirt

    Share this post on StumbleUpon:


    Monday 28 September 2015

    Setup cannot continue with the upgrade because the “beremote()” process has open files.

    I was applying a Service Pack to an Exchange server last week and came across this error message when running the setup wizard:

    Setup cannot continue with the upgrade because the “beremote()” process has open files:

    The server was being backed up with Symantec Backup Exec, this was causing an issue. I stopped the Backup Exec services and was able to continue with the service pack installation.

    Tuesday 22 September 2015

    HP ILO 2 old firmware versions

    I came across an old server that had a very out of date iLO version installed on it. Thankfully I had old copies of the firmware stored on my OneDrive I could use.

    I thought it might be helpful to share the firmware files for others.


    iLO2 version 2.07

    iLO2 version 2.13

    iLO2 version 2.23

    iLO2 version 2.25

    iLO2 version 2.27


    I've found with the older versions you need to do small upgrades at a time for them to apply correctly. Jumping from a really out of date version to the latest version doesn't always work.

    Firefox works best with iLO2 as well.


    Friday 18 September 2015

    How to resolve the error ‘550 5.7.1 Unable to Relay’?

    I recently came across an issue at work where one of our servers wasn't able to send any email alerts out. On troubleshooting the issue we were receiving a '550 5.7.1 Unable to relay' error message.

    Duly checked the receive connectors within the Exchange Management GUI and everything looked okay but still the server wasn't able to relay. On launching the Exchange Management Powershell console we ran the command:

    Get-ReceiveConnector "Receive Connector" | Get-ADPermission -User "NT AUTHORITY\ANONYMOUS LOGON"

    And noticed that instead of there being rights for "ms-Exch-SMTP-Accept-Any-Recipient", there were rights for "ms-Exch-SMTP-Accept-Any-Sender"

    We issued the command:

    Get-ReceiveConnector "Receive Connector" | Add-ADPermission -User "NT AUTHORITY\ANONYMOUS LOGON" -ExtendedRights "ms-Exch-SMTP-Accept-Any-Recipient"

    And the server was able to relay messages once again. We haven't been able to determine, who or what changed the permissions on the connector but they'd been modified and the above command resolved our issue.

    If you are trying to send notifications via your Exchange with an Anonymous connector ensure the following has extended rights:

    NT AUTHORITY\Anonymous Logon {ms-Exch-SMTP-Submit}
    NT AUTHORITY\Anonymous Logon {ms-Exch-Accept-Headers-Routing}
    NT AUTHORITY\Anonymous Logon {ms-Exch-Bypass-Anti-Spam}
    NT AUTHORITY\Anonymous Logon {ms-Exch-SMTP-Accept-Any-Recipient}

    Wednesday 16 September 2015

    Find the Collection Membership of a Specific Machine

    There many times during the course of troubleshooting issues within SCCM where you will need to find out what Collections a specific client machine is a member of. Unfortunately there is no native way of finding that out, but you can use SQL and reports to help you find this information.

    You can run the following SQL query against your SMS database within SQL Management Studio

    select v_FullCollectionMembership.CollectionID As 'Collection ID', v_Collection.Name As 'Collection Name', v_R_System.Name0 As 'Machine Name' from v_FullCollectionMembership
    JOIN v_R_System on v_FullCollectionMembership.ResourceID = v_R_System.ResourceID
    JOIN v_Collection on v_FullCollectionMembership.CollectionID = v_Collection.CollectionID
    Where v_R_System.Name0='ClientMachineName'

    Replace ClientMachineName with the device name

    You can create a custom report within SCCM. You would need to modify the query slightly, you would replace the ClientMachineName section with a parameter, like so:

    select v_FullCollectionMembership.CollectionID As 'Collection ID', v_Collection.Name As 'Collection Name', v_R_System.Name0 As 'Machine Name' from v_FullCollectionMembership
    JOIN v_R_System on v_FullCollectionMembership.ResourceID = v_R_System.ResourceID
    JOIN v_Collection on v_FullCollectionMembership.CollectionID = v_Collection.CollectionID
    Where v_R_System.Name0=@Comp

    I would encapsulate the above query into one dataset and use that to populate the table results within the report. Then create a second dataset holding the SQL query:
    select Name0 from v_R_System

    That can be used to populate the options within your @Comp parameter. Your SQL report builder will look something like this:


    The above SQL should work both on Configuration Manager 2007 and Configuration Manager 2012.

    Thursday 3 September 2015

    Uninstall Project 2013 with Configuration Manager

    As I'm sure all of you have found there are lots of helpful articles out there about how to do a silent install of Microsoft Office/Project/Visio/etc through SCCM, but there is very little information out there on how to do an un-install silently. After much head scratching I finally found the method of doing so...

    1. Navigate to the directory where your install files are located
    2. Edit the config.xml file located within prjstd.ww (note this changes depending on the version of Project)
    3. Remove the values from the Display level line and change it to look like below


    4. Within your SCCM deployment modify the Uninstall file to read:
    setup.exe /uninstall prjstd /config prjstd.ww/config.xml (again note the visio version name will differ depending on the edition)


    5. Click OK and test the uninstallation via SCCM software centre


    Friday 24 July 2015

    Uninstall Visio 2013 with SCCM

    As I'm sure all of you have found there are lots of helpful articles out there about how to do a silent install of Microsoft Office/Project/Visio/etc through SCCM, but there is very little information out there on how to do an un-install silently. After much head scratching I finally found the method of doing so...

    1. Navigate to the directory where your install files are located
    2. Edit the config.xml file located within vispro.ww (note this changes depending on the version of Visio)
    3. Remove the values from the Display level line and change it to look like below


    4. Within your SCCM deployment modify the Uninstall file to read:
    setup.exe /uninstall vispro /config vispro.ww/config.xml (again note the visio version name will differ depending on the edition)


    5. Click OK and test the uninstallation via SCCM software centre

    Tuesday 7 July 2015

    Running Configuration Manager 2012 Remote Control standalone

    In some instances you might not want to roll out the full SCCM console but still allow the user to run the Remote Control SCCM tool.

    Here is how to do it:

    1. Find the directory where the AdminConsole is installed, example: C:\Program Files(x86)\Microsoft Configuration Manager\AdminConsole\bin\i386, copy the following directory and files:
    0000049
    CmRcViewer.exe
    RdpCoreSccm.dll

    2. Copy the whole directory and the files to the computer you want to run Remote Control from. You can create a folder anywhere on the computer, i.e My Documents\Remote Control

    3. Then simply launch the CmRcViewer.exe file and that is you!

    Friday 3 July 2015

    Changing Startup to Automatic on the SCCM Remote Control Service

    One of the biggest bugbears within the support staff is that the Configuration Manager 2012 Remote Tools client service is set to Automatic (Delayed Start) when installed as default.

    If you are working on a users machine and you have to restart it, it can often feel like an age before you can remote control the machine again.

    Using Group Policy and a Group Policy Preference Settings you can change this. Under Services add the SCCM Remote Control Service and change the startup type to “Automatic”.


    Monday 29 June 2015

    Cisco UCS Management Pack troubleshooting

    We are running SCOM 2012 R2 and we recently tried to set up monitoring for our Cisco UCS environment. We had some difficulty, after importing the management pack and setting up the config we were seeing these alerts within SCOM:

    (https://fqdn:443) [Cisco.Ucsm.Proxy.LoadCache.ProbeAction.ps1] Could not load file or assembly 'file:///C:\Windows\TEMP\e1jdhj04.dll' or one of its dependencies. The system cannot find the file specified.

    After extensive research and much banging of heads we discovered that the resolution was to allow the Operations Management Action Account (svc_OMAA in our case) read/write permissions to C:\Windows\Temp on the SCOM management server!

    Thursday 25 June 2015

    Powershell Tip: Search for users with an Active Sync device

    The script below will search through a mailbox database and list the users that have Active Sync devices attached and list the type of device.

    ForEach ($mb in (Get-Mailbox -database DATABASENAME)) { Get-ActiveSyncDeviceStatistics -Mailbox $mb | Select @{Label="Name";Expression={$mb.Name}},DeviceType,DeviceOS,LastSuccessSync}

    Replace DATABASENAME with the name of the database you wish to query

    This script has been test on Exchange 2010 SP1 and Exchange 2010 SP3.

    Tuesday 23 June 2015

    Follow me

    If you wish to be notified of when a new post is published on this site you can either subscribe to the RSS Feed or subscribe to the mailing list.  Please note the mailing list will only send you an email when a new post has been published, you won't receive spam etc.

    My Twitter account also will notify you of any new posts and other useful information.  The hash tag #techielass on Twitter can also be used to follow things that I post via this blog.

    If you have any comments or tips I would love to hear from you so please do get in touch.  I have enabled comments on this blog so please do interact with me, I've love to hear from you!

    Monday 22 June 2015

    Powershell Tip: How many DIMMs are in a machine and utilised

    The following Powershell command will tell you the total amount of DIMM slots within a machine and what is currently installed within those slots, if anything.

    Just save it as a .PS1 file and when you run it you will be asked for the name of the machine you wish to query. If you wish to query your own PC just enter "localhost" as the name.


    $strComputer = Read-Host "Enter Computer Name"
    $colSlots = Get-WmiObject -Class "win32_PhysicalMemoryArray" -namespace "root\CIMV2" `
    -computerName $strComputer
    $colRAM = Get-WmiObject -Class "win32_PhysicalMemory" -namespace "root\CIMV2" `
    -computerName $strComputer

    Foreach ($objSlot In $colSlots){
    "Total Number of DIMM Slots: " + $objSlot.MemoryDevices
    }
    Foreach ($objRAM In $colRAM) {
    "Memory Installed: " + $objRAM.DeviceLocator
    "Memory Size: " + ($objRAM.Capacity / 1GB) + " GB"
    }

    Monday 15 June 2015

    Shrink the SQL Server Reporting Services log database used by ConfigMgr 2012

    So today I came across an issue with my SCCM database server running low on disk space. On investigation I found the ReportServer_log.ldf file had grown to over 320GB in size!

    It would appear this is a known issue and some simple configuration changes to your database setup can resolve this.

    Change the recovery model
    1. Log onto SQL Management Studio and connect to the SCCM instance
    2. Expand Databases and right click on ReportServer (your name may vary depending on your installation)
    3. Go to Options
    4. Change the recovery model from Full to Simple
    5. Click OK to save the changes

    Shrink the file
    1. Log onto SQL Management Studio and connect to the SCCM instance
    2. Expand Databases and right click on ReportServer (your name may vary depending on your installation)
    3. Select Tasks > Shrink > Files
    4. Under File type select Log and click OK
    5. This should reduce the size of the LDF file to a more modest size, you may have to repeat the shrink step two or three times for it to complete successfully

    Change the Maximum File Size
    1. Log onto SQL Management Studio and connect to the SCCM instance
    2. Expand Databases and right click on ReportServer (your name may vary depending on your installation)
    3. Select Properties
    4. Select Files
    5. In the Database files field, scroll until you see the Autogrowth column.
    6. Click on the ellipsis button (…) for ReportServer_log (again this name may vary slightly depending on your installation)
    7. Change the value of the Restrict File Growth (MB) field to a suitable amount for your environment.
    8. Click OK to save the changes

    This should now resolve your issue and not see it reoccur.

    Wednesday 10 June 2015

    Investing in your own career

    As we all know IT is a rapidly progressing market and for us IT professionals that means we're constantly trying to learn and update our core skills to keep up with the changes. And as we're all aware it's not always possible for our employers to provide the necessary time or money to help keep up these skills leaving us in the dilemma to having to invest our own time and money into staying current.

    I've spent my own money on a home lab and given up nights and weekends studying and learning new products. And for me self study and self investment is worth it. The achievement you feel when you pass an exam and gain that qualification is a buzz. There is even more of a buzz when you the skills you have self taught become useful in your day to day job.

    There are lot of resources out there to help you along the way when trying to learn at home. I invested in an HP Microserver a few years ago and it didn't break the bank, and it provides a very nice wee home lab that I've built, broke, re-designed and re-build many a time. The capacity of it provides enough grunt that I can emulate a small Microsoft lab similar to what you would use while on a Microsoft training course in a classroom.

    Home Labs or Virtual Labs
    HP regularly run cashback offers on their Microservers, the current cashback deal runs until the 30th June 2015. I've found the cheapeast deals to be had over at ServersPlus.com - http://www.serversplus.com/microserver_cashback

    You can find free evaluation copies of Microsoft's software here https://technet.microsoft.com/en-gb/evalcenter The trial licenses last 180 days which should be adequate enough to have a good understanding of the software.

    Microsoft also offer a large selection of free Virtual Labs. Many are targetted towards learning a certain skill within their products so you don't have the free rein you do with your own home lab however they can be useful and I have used in them while at work when I need to understand something or have been travelling and don't have access to my home lab. You can find them over at https://technet.microsoft.com/en-us/virtuallabs/bb467605.aspx


    Training resources
    Microsoft have a free Virtual Academy open to all that. It can help you plan what certification track you wish to persue, and offers you training materials that can help you achieve those certifications. I've not seen anyone use this resources solely as a method of passing a Microsoft exam however it is a useful resource.

    http://www.microsoftvirtualacademy.com/

    Videos from previous MS Ignite and TechEd Europe events are available online at Channel9 which can be helpful in getting an overview on certain products or learning some hints and tips from the field. There are also a lot of videos from behind the scenes. The videos can also be downloaded as MP4s so you an store them on your device of choice and watch while
    commutting etc.

    https://channel9.msdn.com/

    There are a lot of other useful resources out there than can help you invest in your career when your employer can't help. Learning in your own time can can hinder your family/social life however if you show willing to invest in yourself and your career it could lead to great things!

    Tuesday 9 June 2015

    vCenter Server 5.5 Update 2e - Build 2646482 Download

    In April VMware released vCentre Server 5.5 Update 2e Build 2646482, I had some issues installing it within my environment which I documented here
    vCentre Server 5.5 Update 2e Build 2646482 Install

    For those of you wishing to download and install the update within your environment it can be found here:
    Download VMware vCenter Server 5.5 Update 2e

    Sunday 7 June 2015

    Abseil complete!

    Today I abseiled off the Forth Rail Bridge in order to raise some money for Macmillan Cancer Support. A completely terrifying experience but totally exhilarating at the same time!! :) A HUGE big thank you to everyone who sponsored me and helped raise a whooping £220, thank you!!! :) Now I'm off to get my sharpie and scratch "abseil off the Forth Rail bridge" from my bucket list. :) :) :)


    Friday 5 June 2015

    PXE Boot Dell Venue 11

    I recently had to image a Dell Venue 11 7130 vPro tablet using SCCM 2012. The BIOS version the table had installed (A10) wouldn't allow PXE boot, I had to upgrade the tablet to use the A13 BIOS version before it would PXE boot.

    http://www.dell.com/support/home/us/en/19/product-support/product/dell-venue-11i-pro/drivers

    Tuesday 2 June 2015

    Patch ConfigMgr 2012 x64 clients during a task sequence using the PATCH property

    We recently updated our SCCM version to the latest cumulative update and I wanted to update our task sequence so that new clients were deployed with the latest SCCM agent version.

    In order to do this I completed these steps (please note we only deploy 64 bit clients so this tutorial only deals with these):

    1. Open your task sequence

    2. Within your Partition Disk 0 - BIOS/Partition Disk 0 - UEFI steps ensure the main partition has the following variable set OSDTargeSystemDrive

    3. Create a command line step directly before the "Setup Windows and ConfigMgr" step

    4. Within the command line enter the following text: cmd /c xcopy *.* %OSDTargetSystemDrive%\windows\CCMHotfixes /E /H /C /I /Q /Y and select the package that your patch resides in

    This step copies the file from your SCCM server to the machine being imaged

    5. Within your "Setup Windows and ConfigMgr" step enter the following within Installation properties: PATCH="C:\windows\CCMHotfixes\configmgr2012ac-r2-kb3054451-x64.msp"
    You will need to change the filename as appropriate based on the update you are applying.

    Wednesday 27 May 2015

    Do you prefer video tutorials or written tutorials?

    I'm thinking about doing some tutorial type posts on certain Microsoft, Veeam and VMware products and not sure where to do them as videos or written posts - what would you prefer to see?


    Tuesday 26 May 2015

    Exchange 2010 EMC "Kerberos" authentication failed

    Came across an issue today where when I launch the Exchange 2010 EMC I was presented with the error message:

    "The attempt to connect to http://server.domain.com/PowerShell using "Kerberos" authentication failed: connecting to remote server failed with the following error message : The WinRM client cannot complete the operation within the time specified. Check if the machine name is valid and is reachable over the network and firewall exception for Windows Remote Management service is enabled. For more information, see the about_Remote_Troubleshooting Help topic."

    Not an error I had seen before so after searching around the Internet for awhile I came across the correct fix for this issue.

    1. First Close EMC

    2. Navigate to C:\users\specific user\AppData\Roaming\Microsoft\MMC and delete the Exchange Management Console config file

    3. Then within the registry HKCU\Software\Microsoft\Exchangeserver\v14\AdminTools\NodeStructureSettings delete the value NodeStructureSettings

    4. Log off and back on

    5. The EMC should now launch fine

    Monday 18 May 2015

    Installing the VMware vSphere client on Windows Server 2012 R2

    I had occasion to install VMware vSphere client my home lab server which is a domain controller and running Windows Server 2012 R2 but ran into two problems... thought they were worth documenting.

    The first issue was that I was told the installer wasn't compatible on the Operating System I was running.  In order to get round this, I navigated to the location of the installer. Highlighted it, right clicked and select properties.  I clicked on the Compatibility tab and set it so the installer would run as if it was on a Windows 7 machine.


    I tried to install the client again but ran into ANOTHER problem! The GUI installer was complaining about being installed on a domain controller.  To get around this issue I broke out an elevated command prompted and issued the command: 

    VMware-viclient-all-5.5.0-1618071.exe /VSKIP_OS_CHECKS="1"


    After all that the client successfully installed!

    Tuesday 12 May 2015

    Installing VMware Workstation alongside Hyper-V

    For the past three years I've been working for a Microsoft Partner company in Scotland and as you can imagine their primary focus was on Microsoft products and the virtualisation technology the recommended to clients as Hyper-V so the majority of my focus has been on using that.  As such I set up a lab at home running Windows Server 2012 R2 and Hyper-V to help teach myself bits and bobs.

    I recently changed job and although the company I now work for is a Microsoft Partner also they focus more on using VMware as the virtualisation technology so today I decided to set up a wee mini lab to help get me back up to speed with it and test a few things.

    I wanted to keep my Hyper-V in tact and run the new VMware lab in parallel, so to do that I downloaded a free trial of VMware Workstation onto my home lab server (HP Microserver N40L) but ran into an issue when trying to get it to install.  I was told I had to uninstall Hyper-V first.

    After a little digging I found a useful work around:

    1. Open Hyper-V Manager and click on "stop service" in the right panel
    2. Open an elevated command prompt and type:
      bcdedit /set hypervisorlaunchtype off
    3. Restart your computer
    Hyper-V is now disabled and you can run VMware workstation and your lab.  When you wish to switch back to using your Hyper-V lab carry out the following: 
    1. Open an elevated command prompt and type:
      bcdedit /set hypervisorlaunchtype auto
    2. Restart your computer
    A nice little workaround if you are switching between the two types of lab. 

    Saturday 9 May 2015

    Sponsor my abseil please?

    In aid of MacMillan Cancer Care I will be abseiling off the Forth Rail Bridge on the 7th June with several friends.

    This event is run in conjunction with the Rotary Club of South Queensferry. The abseil is 165ft from the bridge onto the beach below. Not sure whether I'll be doing the abseil crying, screaming or laughing - no matter what way I complete the abseil it is sure to be a great experience while raising money for a great charity.

    If you could spare a few pennies or pounds to sponsor me and this great cause it would be much appreciated.

    My JustGiving page is located at https://www.justgiving.com/SazLean

    Friday 8 May 2015

    Writing to Event Logs with Powershell

    Was pondering how to trigger a event log entry on a server today at work in order to test SCOM monitoring, came across Powershell and the various commands that can be used for to do something like this. Found it quite interesting so thought it would be worth writing a wee post about it.

    To begin you can see what Powershell commands are available in relation to the Eventlog:

    get-command -Name *eventlog


    The one that writes the event logs is called "Write-EventLog". The command syntax should be something as straightfoward are this:

    Write-EventLog -LogName Application -Source "Test EventLog" -EntryType Information -EventID 1 -Message "This is a test message".

    In this command the following parameters are required - LogName, Source, EventID.

    Unforuntately this generates an error message because the source does not exist on the machine.  The cmdlet New-EventLog should help us here.

    To fix the previous error we need to run the following command:

    New-EventLog -LogName Application -Source "Test EventLog"

    Then we can run:
    Write-EventLog -LogName Application -Source "Test EventLog" -EntryType Information -EventID 1 -Message "This is a test message".

    As we can see within the Event log the entry is now there:


    Why not follow me on Twitter for other hints and tips - www.twitter.com/weeyinfotos

    Wednesday 6 May 2015

    Do you prefer video tutorials or written tutorials?

    I'm thinking about doing some tutorial type posts on certain Microsoft, Veeam and VMware products and not sure where to do them as videos or written posts - what would you prefer to see?


    Tuesday 5 May 2015

    Follow Me

    If you wish to be notified of when a new post is published on this site you can either subscribe to the RSS Feed or subscribe to the mailing list.  Please note the mailing list will only send you an email when a new post has been published, you won't receive spam etc.

    My Twitter account also will notify you of any new posts and other useful information.  The hash tag #techielass on Twitter can also be used to follow things that I post via this blog.

    If you have any comments or tips I would love to hear from you so please do get in touch.  I have enabled comments on this blog so please do interact with me, I've love to hear from you!

    Veeam - NFC storage connection is unavailable

    After upgrading a client's Veeam solution to version 7 patch 4 I came across  this error message for the replication jobs that were set up and it had me a little confused:

     Processing configuration Error: Client error: NFC storage connection is unavailable. Storage: [stg:datastore-22,nfchost:host-21,conn:172.1.1.1]. Storage display name: [Temp].
    Failed to create NFC download stream. NFC path: [nfc://conn:172.1.1.1,nfchost:host-21,stg:datastore-22@Server_replica/Server.vmx].


    There is a knowledge base article on Veeam's website regarding this - http://www.veeam.com/kb1198 but given nothing had changed regarding ports opening/closing etc I was sceptical that this was the root cause.  Especially since the replication jobs had worked an hour earlier, before the patch was applied. 

    After much head scratching and restarting of servers etc I found the resolution to the issue.  Within the VMware vSphere client there is an option to rescan the storage attached to the host to help pick up new volumes, changes, etc, once I ran that on the host that the backup storage is attached to the replica jobs completed successfully!!


    Am still unsure as to why the error occured or why that fixed the issue but it did, one worth remembering!!

    Saturday 25 April 2015

    Sponsor Me Please

    In aid of MacMillan Cancer Care I will be abseiling off the Forth Rail Bridge on the 7th June with several friends.


    This event is run in conjunction with the Rotary Club of South Queensferry. The abseil is 165ft from the bridge onto the beach below. Not sure whether I'll be doing the abseil crying, screaming or laughing - no matter what way I complete the abseil it is sure to be a great experience while raising money for a great charity.

    If you could spare a few pennies or pounds to sponsor me and this great cause it would be much appreciated.

    My JustGiving page is located at https://www.justgiving.com/SazLean

    Friday 24 April 2015

    vCenter Server 5.5 Update 2e - Build 2646482

    Am working on a VMware 5.5 environment at the moment and am trying to get it up to date as it's been lying dormant for about 6 months.  So one of the first tasks I had on my to-do list was to update the vCenter server to the latest version so I could update the ESXi hosts.

    Stumbled across a problem, one being the vCenter server was running the appliance version of the product which is Linux/web based (never seen before) and second when I tried to apply the update it hung and killed the server.

    After much reading about how the vCenter server appliance worked, familiarising myself with the console layout/settings and how to update it's version I duely starting the update process.

    So I took a snapshot of the VM so that I had a rollback plan.  Logged into the vCenter web console, went to the Update tab and hit Install updates.

    At this point it started to install vCenter Server 5.5 Update 2e - Build 2646482... I could see from the vSphere performance tab the server was downloading content and working away, unfortunately there was no progress bar to indicate completion status etc.

    So I left it be, got on with some other tasks and went for my lunch. Nearly an hour and a half had passed and the install hadn't completed, I started to get suspicious and did some digging round the forums.

    I opened a SSH console and logged in and typed the command:

    tail -f /opt/vmware/var/log/vami/updatecli.log

    Which showed the current state of the log files and the Log Browser service was stopping....  It was stuck in that state.  I tried to restart the server to resolve the issue but that completely broke the install so I had to revert to the snapshot that I had taken earlier.

    On investigation I found this article in relation to server times - http://pubs.vmware.com/vsphere-51/index.jsp?topic=%2Fcom.vmware.vsphere.install.doc%2FGUID-9FD3A5E3-6C2D-4161-9270-4BF57FADCE6D.html

    When I checked the time of my vCenter server and the ESXi hosts they were all out.  The vCenter server was out by two hours and the ESXi hosts were out by 16 hours!!!  I corrected all those settings so they were as they were supposed to be and the upgrade to 5.5 Update 2e - Build 2646482 completed successfully.

    Ensure your servers are all at the correct/same time. It's the simple things that can catch you out.


    References
    vCenter Server 5.5 Update 2e - Build 2646482 - Release Notes: https://www.vmware.com/support/vsphere5/doc/vsphere-vcenter-server-55u2e-release-notes.html

    Tuesday 21 April 2015

    WMI Filters

    More often than not when deploying Group Policy you need to target specific types of machine, or OS, or architecture and do this you need to use WMI filters.

    Here are some helpful tips on what the numbers you are using mean:

    WMI Win32_OperatingSystem ProductType:

    ProductType 1 = Desktop OS
    ProductType 2 = Server OS - Domain Controller
    ProductType 3= Server OS - Non domain controller

    WMI Win32_OperatingSystem Version:

    5.1 - Windows XP

    5.2 - Windows Server 2003

    5.2.3 - Windows Server 2003 R2

    6.0 - Windows Vista and Windows Server 2008

    6.1 - Windows 7 and Windows Server 2008 R2

    6.2 - Windows 8 and Windows Server 2012

    6.3 - Windows 8.1 and Windows Server 2012 R2


    In my case today I had to target servers that weren't domain controllers and were running Windows Server 2012 R2 so I used the following WMI filter:

    select * from Win32_OperatingSystem WHERE Version like "6.3%" AND ProductType="3"

    The following filter is also useful, it will select all Windows Server 2012 R2 objects, normal servers and domain controllers:

    select * from Win32_OperatingSystem WHERE Version like "6.3%" AND (ProductType="2" or ProductType="3")


    IMPORTANT DISCLAIMER: 
    Always test your Group Policies and WMI filters before deploying.

    Thursday 16 April 2015

    Follow me

    If you wish to be notified of when a new post is published on this site you can either subscribe to the RSS Feed or subscribe to the mailing list.  Please note the mailing list will only send you an email when a new post has been published, you won't receive spam etc.

    My Twitter account also will notify you of any new posts and other useful information.  The hash tag #techielass on Twitter can also be used to follow things that I post via this blog.

    If you have any comments or tips I would love to hear from you so please do get in touch.  I have enabled comments on this blog so please do interact with me, I've love to hear from you!

    Tuesday 14 April 2015

    Lync changing to Skype

    As I'm sure some of you are aware Lync is being re-branded "Skype for Business".  Those using Lync Online with Office 365 ProPlus, Office 365 Business Premium or Office 2013 will see the new Skype for Business client replace the Lync client, this is due to roll out within the April patching updates.  *Note today is Patch Tuesday*

    This update will change the UI experience for the end user, if you are concerned about the change to your users I would suggest watching and reading this following Microsoft blog post - http://blogs.office.com/2015/04/01/whats-new-in-skype-for-business-and-how-you-can-take-control-of-updates/

    They give some helpful hints in out to manage the roll out and help you understand what to expect.

    Microsoft say that the backend of the service, which is currently called Lync Online Service will be rebranded as Skype for Business Online by the end of May.

    I believe the new Skype for Business server product will be available for download from Microsoft's Volume Licensing Service Center (VLSC) on the 1st May 2015.

    As well as giving a new UI experience, Skype for Business promises to keep all the good features about Skype and Lync and combine them both.

    Despite the name change the product will still continue to run on the Lync backbone so us fellow techies shouldn't have to suffer to much pain.

    Friday 10 April 2015

    SCOM 2012 R2 Autogrowth settings are static!

    After using SCOM 2012 R2 for a few weeks we started to get "Free Space Low" alerts for it's own databases.

    On investigation the default SQL instance has been setup with Autogrowth set to None.  So remember to change this to something more appropriate after installation or you'll soon run into some issues.

    As a minimum I changed the settings to be:

    MOM Data 
    Initial size: 5000MB
    Autogrowth: 1000MB, unlimited


    MOM Log
    Initial size: 1000MB
    Autogrowth: 100MB, unlimited

    Tuesday 7 April 2015

    Deploying Windows Update (.msu) with SCCM

    I was recently packaging up an application for SCCM and one of the pre-requisites of this application was that a Windows Update (.msu) had to be installed.

    In order to package up this Windows Update and deploy it as an application I did the following:


    • To silently install the update I ran the following command within the application deployment -wusa.exe KBxxxxxx.msu /quiet /norestart
    • In the detection method tab, set the option to "Use a custom script to detect the presence of this deployment type" and select Edit
    • Change the script so that it is set to Powershell and enter in the following command -
      get-hotfix | Where-Object {$_.HotFixID -match "KBxxxxxx"}
    The deployment ran fine after that.  If you have any execution errors from the script you can change the PowerShell Execution Policy to bypass on the SCCM agent client settings. 

    Check out my blog post on setting the PowerShell Execution Policy for all SCCM agents - http://www.techielass.com/2015/03/powershell-execution-settings-sccm-agent.html


    Saturday 4 April 2015

    Sponsor Me Please

    In aid of MacMillan Cancer Care I will be abseiling off the Forth Rail Bridge on the 7th June with several friends.

    This event is run in conjunction with the Rotary Club of South Queensferry. The abseil is 165ft from the bridge onto the beach below. Not sure whether I'll be doing the abseil crying, screaming or laughing - no matter what way I complete the abseil it is sure to be a great experience while raising money for a great charity.

    If you could spare a few pennies or pounds to sponsor me and this great cause it would be much appreciated.

    My JustGiving page is located at https://www.justgiving.com/SazLean

    Friday 3 April 2015

    Where has the System Centre Management service gone?

    Have been doing some work with System Center Operations Manager (SCOM) 2012 R2 this week and after some changes I had to restart the SCOM agent service to make them take effect.  Only I couldn't find the "System Center Management" service to do this however, it appears Microsoft has rebranded the service and it's now called the "Microsoft Monitoring Agent" service.

    Along with the rebranding of the service, Microsoft have added functionality to the agent.  It now has standalone features.

    To get more information about MMA and it’s new functionalities here are some useful links:

    Thursday 2 April 2015

    PowerShell Execution Settings SCCM Agent

    If you are using any kind of PowerShell commands within your SCCM application deployments you and are having issues getting the commands to run because of the the PowerShell Execution Policy level then a way around it is to do the following:


    • Within the SCCM console go to Administration > Client Settings > Open Default Client Settings
    • Click on Computer Agent
    • Set the PowerShell Execution Policy to Bypass
    • Click OK
    This setting will take a while to roll out to all your clients but should fix any errors you've been having with PowerShell running. 

    Monday 30 March 2015

    Move a Distribution Point Content Library Between Drives

    If you have installed a Distribution Point onto a server and you wish to change the drive that the content is now stored on you can do this by using the "ContentLibraryTransfer.exe" tool that was released within the SyStem Centre 2012 R2 Configuration Manager Toolkit.

    Download it here - http://www.microsoft.com/en-us/download/confirmation.aspx?id=36213 and install the components

    ContentLibraryTransfer.exe is a tool that will move a distribution point’s content store from one drive to another. It's a very simple process.

    To use the tool, open an administrative command prompt and navigate to the location of the ContentLibraryTransfer.exe tool.

    Once there the syntax of the tool is as follows:

    ContentLibraryTransfer.exe -SourceDrive D -TargetDrive F

    So the above command would move the content from the D drive to the F drive.

    If you want to see a log file of what has happened etc you can pipe the results to a text file as follows:

    ContentLibraryTransfer.exe -SourceDrive D -TargetDrive F > C:\Results.txt


    Thursday 26 March 2015

    New PC build for Windows 10

    I am currently running an aging Windows 7 PC at home as my main computer, it still has some decent tin inside it unfortunately it's starting to flag alittle when I am doing Photoshop editting of my photography and the storage configured inside is outgrowing my needs as well.

    When Windows 10 preview was released back in October 2014 I fell in love and started about reading up on what I needed to do to build a good PC that could take care of my techie needs and Photoshop requirements.

    While reading up on how to spec a PC for Photoshop use I learnt the Photoshop uses the memory and then uses available HDD space when it runs out of memory. So I've tried to pick out good quality fast RAM (and will add more later).  later I will add an SSD that can be utilised exclusively to enhance Photoshop's performance (more info on that here  https://helpx.adobe.com/photoshop/using/memory-performance.html#assigning_scratch_disks)

    I've got the following kit:

    Memory: 8GB 1600MHz DDR3 CL10 DIMM HyperX Fury Series
    Motherboard: Asus Z97-K Socket 1150 VGA DVI HDMI 7.1 Channel HD Audio ATX Motherboard
    Network adapter: Asus PCE-N15 adapter
    CPU: Intel Core i5 4590 3.30GHz Socket 1150 6MB L3 Cache Retail Boxed Processor
    PSU: Antec VP-Series 550W Fully Wired Efficient Power Supply
    DVD Drive: Samsung SH-224DB 24X Internal DVD Writer with SATA - OEM
    Case: Antec VSP000 Silenced Tower Case - Black
    CPU Cooler: Raijintek Aidos Direct Contact CPU Cooler - Black
    Graphics Card: Have yet to decide...


    Wednesday 25 March 2015

    Windows 8.1 Troubleshooting

    When I was at TechEd Europe last year in Barcelona, I attended one of Sami Laiho's session - Windows 8.1 Black Belt Troubleshooting.  It was ultimately voted the 4th favourite session of the whole event by attendees.

    I re-watched it on Channel 9 recently as I had recommended it to a colleague.

    https://channel9.msdn.com/Events/TechEd/Europe/2014/WIN-B329

    Take the time to watch, you'll defo learn something. And if you ever get the chance to attend a session with Sami Laiho in person, don't miss it!

    Monday 23 March 2015

    Enabling Powershell support in your boot image - SCCM 2012 R2

    I am currently running SCCM 2012 R1 CU3 (version 5.0.7958.1401) and was looking to add Powershell support to my Boot Images but was constantly coming up against an error message.

    Let me walk you through the process, the error message and solution.

    To add Powershell support to your Boot Image, launch your SCCM Console and browse to Software Library > Operating Systems > Boot Images


    Right click on the Boot Image you wish to modify and click Properties. Then click on Optional Components.

    Click on the Yellow star to add a component


    If you type Powershell into the filter it will display three options, select "Windows Powershell (WinPE-Powershell)".  A prompt will come up telling you that you need to enable "Microsoft .NET (WinPE-NetFx)"


    If you click OK three times you will be prompted that you have made a change and you need up update the distribution points.  Click YES and the update Distribution Points Wizard will display, let the wizard run.

    The Wizard will fail and offer the following error message:


    The problem is that when you filter the optional components it hasn't automatically enabled the "Microsoft .NET (WinPE-NetFx)" component that is needed alongside Powershell.  You need to manually add this in also.

    So click on Close on the failed distribution wizard.

    Right click on the boot image that you wish to modify, select Properties and Optional Components.  Powershell should still be listed, so click on the yellow star and search for "NetFx" and select this and Click OK three times.  Again you will be prompted to update the distribution points.


    Allow this to complete and you will be provided with a window saying your boot image has been successfully updated.

    The lesson learned here is if you are filtering the optional components, ensure you read any warnings that are shown and manually check the other required components.

    Saturday 21 March 2015

    Sponsor my abseil - please?

    In aid of MacMillan Cancer Care I will be abseiling off the Forth Rail Bridge on the 7th June with several friends.

    This event is run in conjunction with the Rotary Club of South Queensferry. The abseil is 165ft from the bridge onto the beach below. Not sure whether I'll be doing the abseil crying, screaming or laughing - no matter what way I complete the abseil it is sure to be a great experience while raising money for a great charity.

    If you could spare a few pennies or pounds to sponsor me and this great cause it would be much appreciated.

    My JustGiving page is located at https://www.justgiving.com/SazLean

    Thursday 19 March 2015

    SQL Saturday #388

    SQL Saturday #388 is being held in Edinburgh, Scotland on the 13th June 2015.  SQL Saturday events are great for SQL Professionals and those wishing to learn about SQL.

    At the event in June Thomas Sykes will be talking about the rapidly evolving SQL offerings within Azure and how you can use it to host a scalable website.  Definately worth hearing!

    The event itself is free to attend, however they are you pay £6 towards food costs.  To register pop over to: https://www.sqlsaturday.com/register.aspx